fbpx

Your Hamstrings are not the Enemy- So Stop Stretching Them!


Feelings can be deceiving, and so can the word “tight.” Every day, many people all over the world get on the floor or on their feet and stretch their “tight” hamstrings. Interestingly, those same hamstrings are still “tight” after days, months and years of stretching them. Hmm? If stretching them were actually doing something, shouldn’t they be “untightened” by now? You’d think so, wouldn’t you?

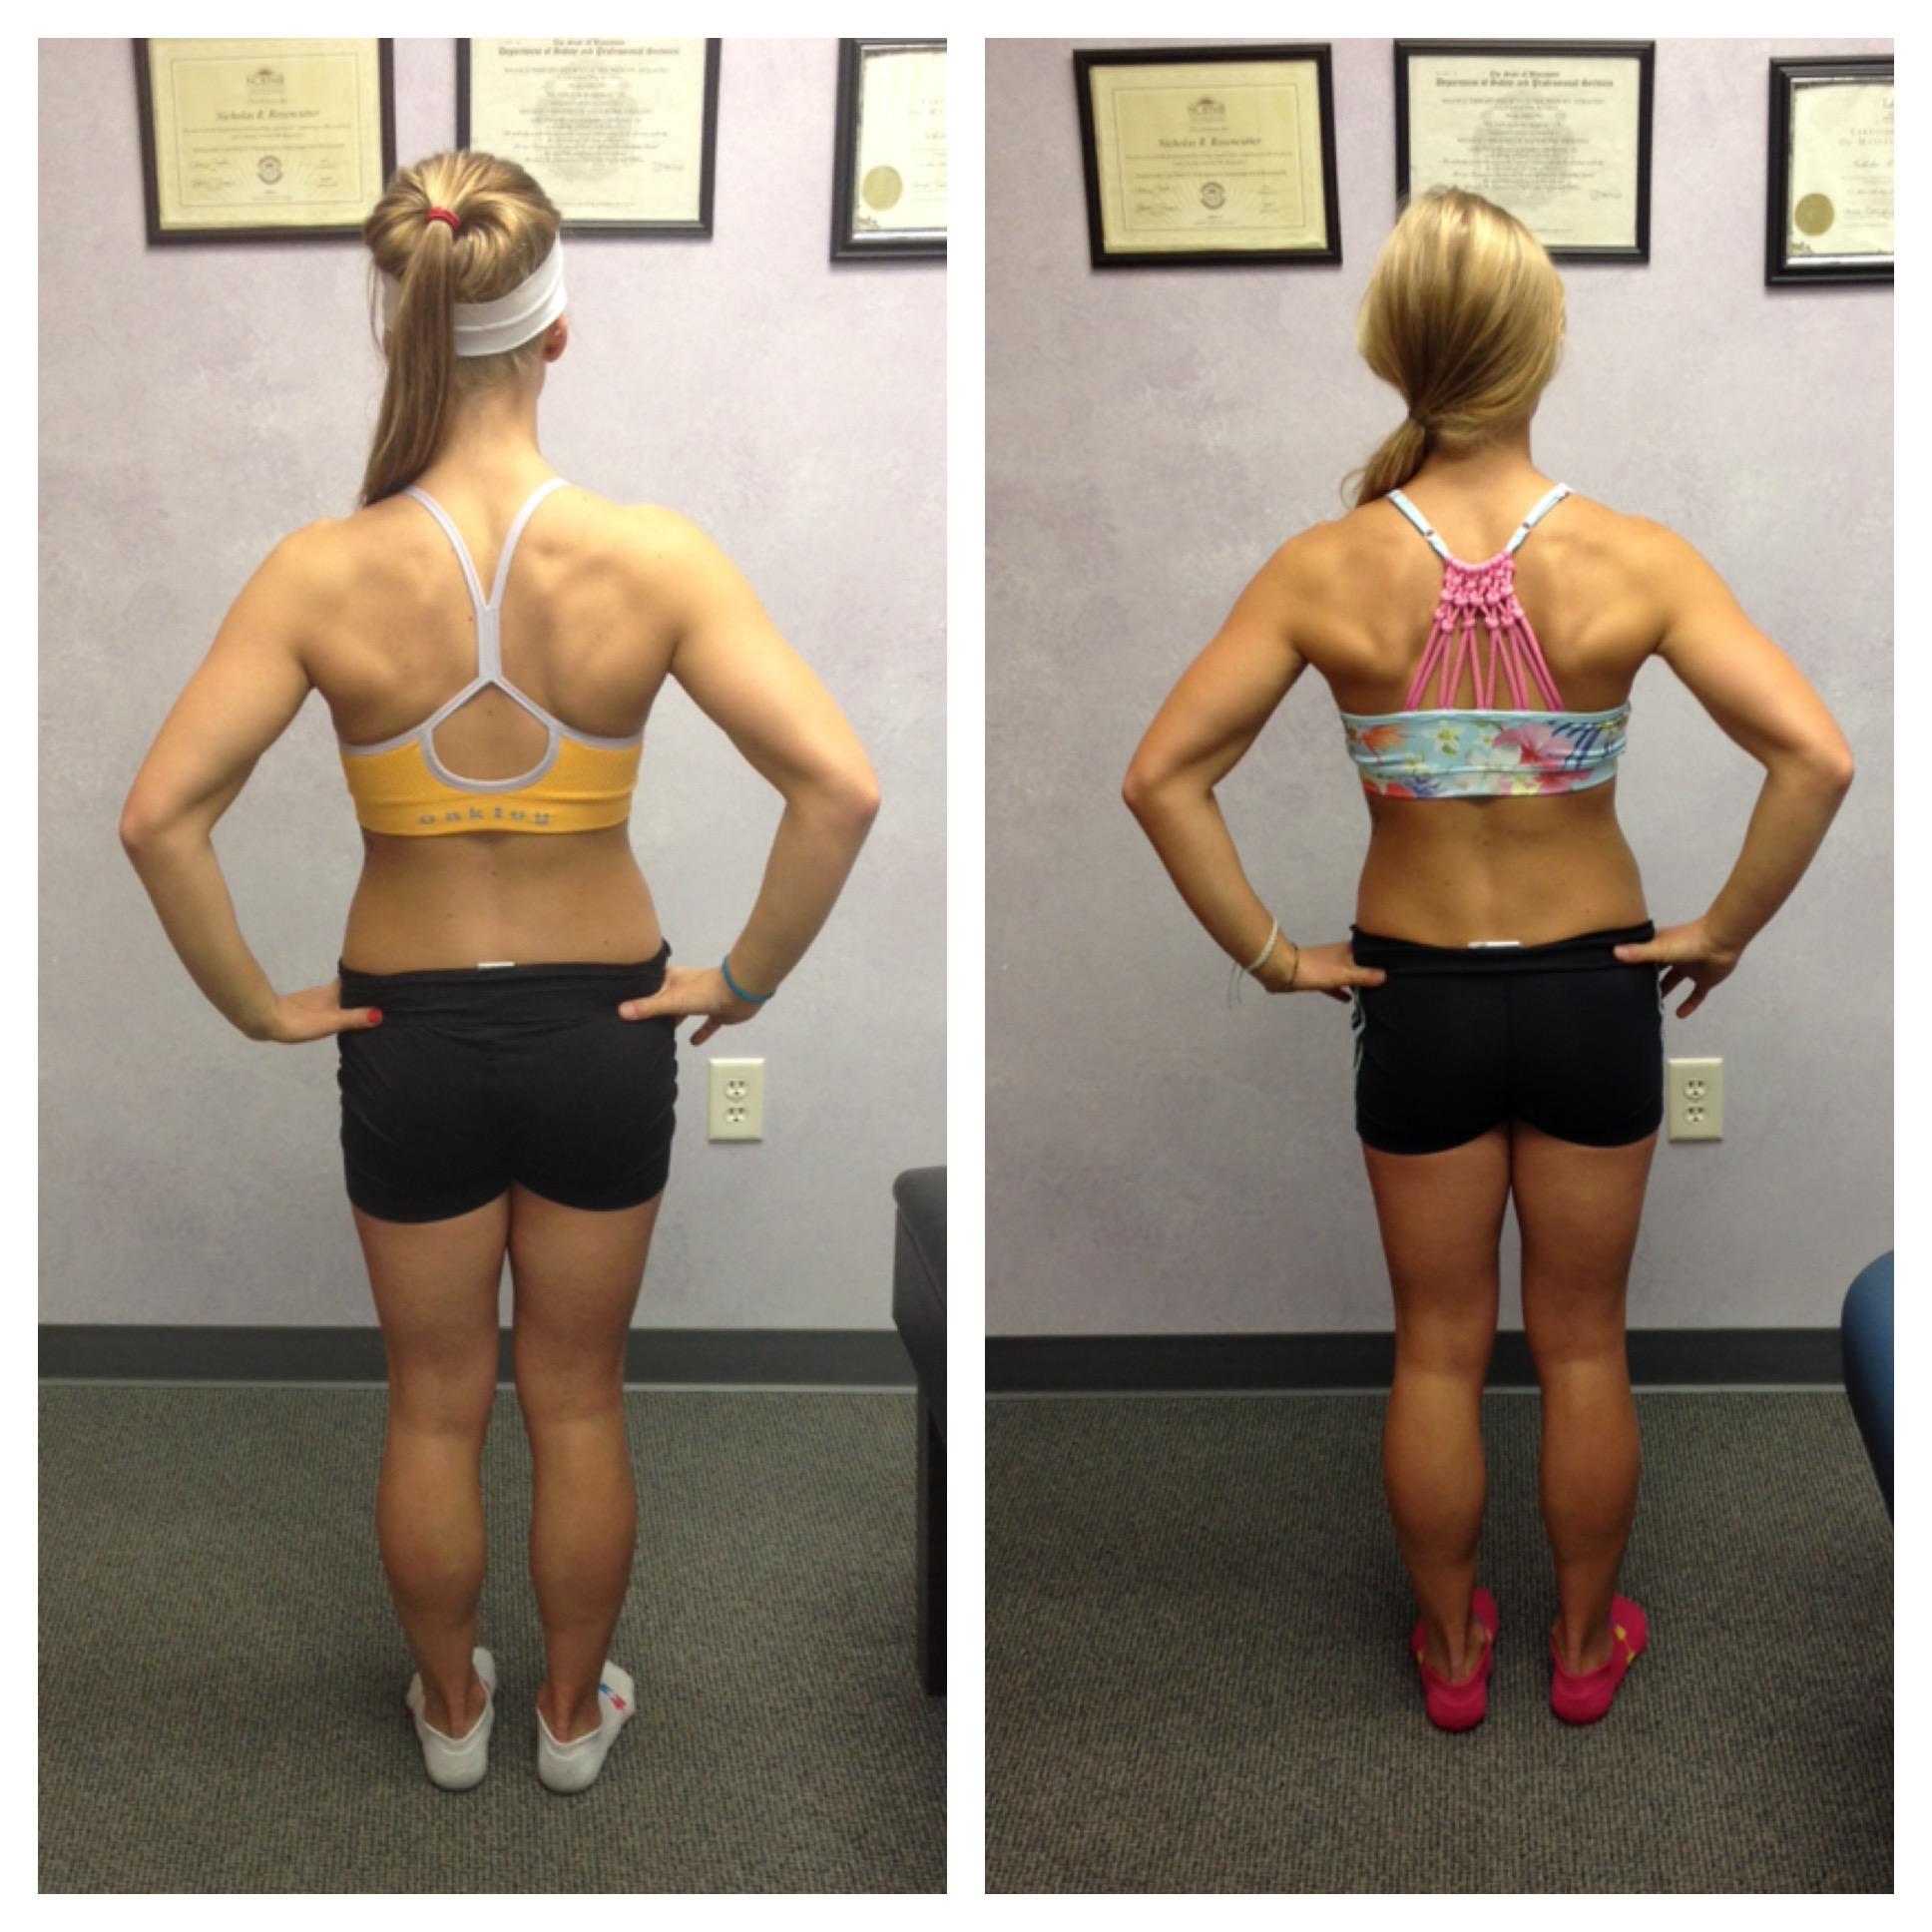
With some fairly uncommon exceptions, on most people, the hamstrings are not “tight” in the sense that they are actually stiff or in a shortened position, needing to be stretched. They are actually being pulled TAUT because they are stuck in a lengthened position, due to the pelvis being tilted forward (anterior tilt). They are in a constant state of being OVERSTRETCHED. In this oh so common situation, what do you think the continued stretching of these already overstretched hamstrings leads to? You guessed it! An even worse position of the pelvis and even “tighter” hamstrings.

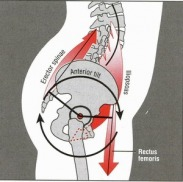
Are there some people out there who have hamstrings that are actually stiffened and/or shortened up and are actually “tight.” Sure, some people have a pelvis that is tilted the opposite way, with hamstrings that are being shortened; however, in my experience, about 9 out of 10 people come in with a forward tilted pelvis and hamstrings that are weak and long. The muscles on the front of the pelvis, the hip flexors, are usually the suspects that actually should be stretched, or at least inhibited (shut off), since they are often shortened and amped up from sitting all day. These hip flexors pull the pelvis forward, effectively putting the hamstrings in a tough to deal with position on the back side. To add fuel to the fire, the ever so important glute muscles cannot effectively do their job in this faulty position, which leads to even more problems for the hamstrings. Not only are they locked in an overlengthened position, but now they also have to do extra work since the glutes are out of the picture. The brain engages them even more (or at least attempts to; we actually need to get better at engaging them in a correct manner)  to make up for the glutes’ lack of contribution to the group project. No wonder they’re so “tight” and angry. If you can think of a time that you did most of the work in a group project, I bet you can relate with how pissed off you probably were.

Here’s an easy way to tell if you actually have stiff/short hamstrings: Lay on your back and make sure you low back is flush with the floor, table, ground or whatever it is that you decide to lay on.  Keeping your leg straight, raise your leg up as high as you can.   Ideally, you’d do this actively (you raising it) and also passively (someone else raising it) to get the full rundown but assuming you are on your own, we can just look at the active version for now.  If you can get your leg to between 80 and 90 degrees of motion (your foot is basically facing the ceiling or sky), you have normal hamstring length and probably suffer from one of the situations we talked about earlier, if you tend to feel like your hamstrings are tight.  If you had to put significant effort in to get your low back to touch the floor during set up, this is probably the case.  If you can go beyond 90, you definitely have excessively lengthened hamstrings from a structural standpoint, and stretching should be the last thing you do.    If you are struggling to get near 80 to 90 degrees, you may actually have some legit tissue stiffness (could still be a neurological issue).  The rest of this article will address what we need to do if you fall under one of the first two categories, yet still feel like your hamstrings are constantly “tight.”

So what do we need to do to address the situation?

We need to get hip flexors to chill out a little bit and get the hamstrings to actually shorten up and engage more effectively, tilting the pelvis back to neutral. There are other muscles and factors at play here as well and if you throw in the possibilities of rotation, shifts and any other side to side differences, we have plenty more to talk about, but to keep the concept simple and straight forward, we will focus on the hip flexors and hamstrings for now.

Here are three great exercises you can use to get the process started:

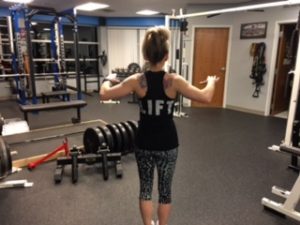
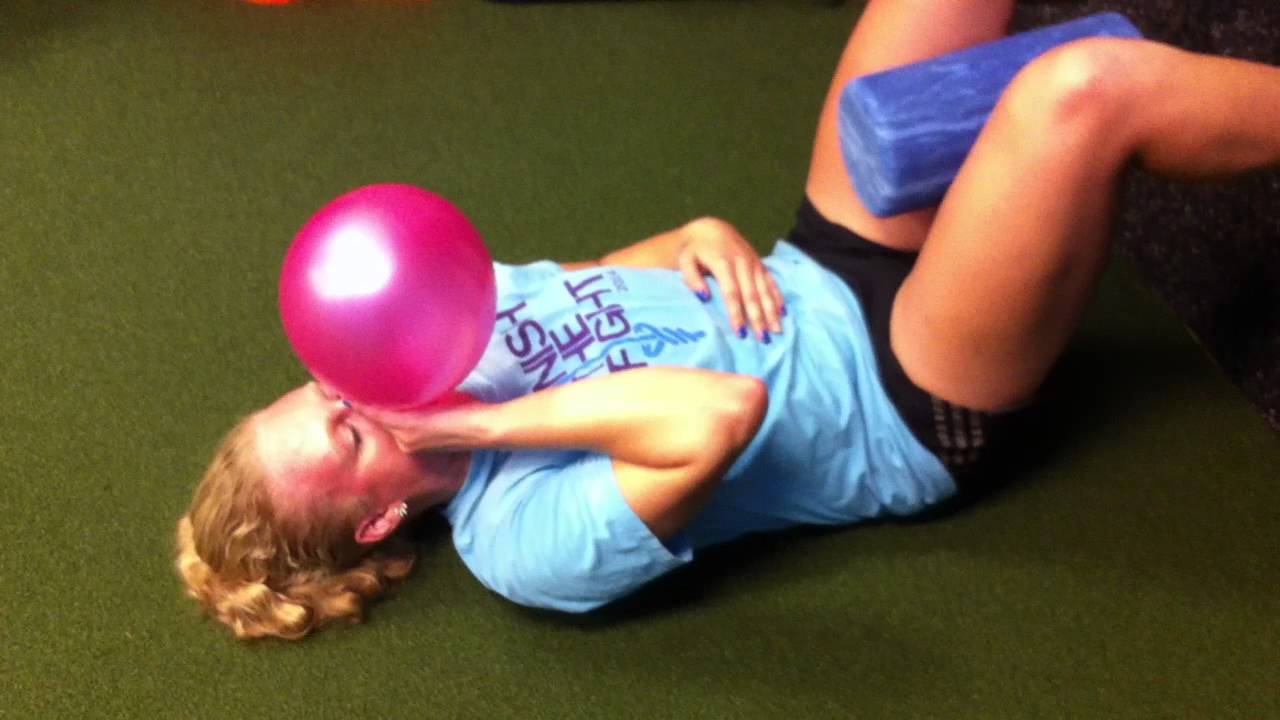
90/90 Breathing–  Set up in a 90/90 position as shown and be sure your low back is solid against the floor.  To do this, think about pulling down through your heels on the wall as you engage your hamstrings, effectively tilting your pelvis back under you.   This action and this position lines our pelvis and ribs up over one another so that our hamstrings as well as our diaphragm are in an better position to work ideally.  Inhaling through our nose while getting three dimensional expansion around our abdomen and chest, followed with a full exhale through our mouth, driving our ribs down, back and in,  will help to solidify a better rib and pelvic position, as well as reset our nervous systems, in order to allow us to create new positions and muscle firing patterns.

YouTube player

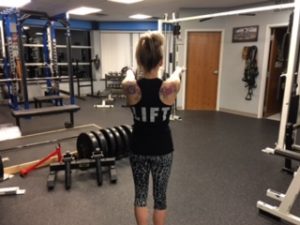
The Hip Flexor Stretch-  Many times, taking care of the rib and pelvic positions with the breathing drill above will eliminate the need for this drill; however, it can still be very useful if you do have a true stiffness or shortness in your hip flexor muscles, especially if you sit a lot all day.   Set up in a 90/90 position as shown in the picture.  Simply place your back foot on a box, chair, etc. to increase the pull.   Be sure to keep your thigh and trunk in a straight line to avoid putting unwanted stress on your low back and front of your hip.  Squeeze the glute of your down leg and brace your abs (harden up like you’re going to get punched in the stomach) to create the opening of the front of your hip that you are looking for.  This will help to pull the pelvis back in position, get the hip flexors to open up and let go, while allowing the glute to be in a better scenario to do its job with the follow up glute bridge exercise shown next.

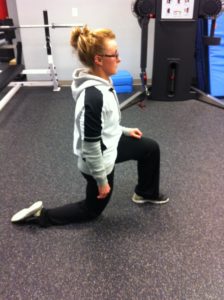
           Be sure thigh and trunk are lined up straight as shown and elevate the back foot to increase the pull

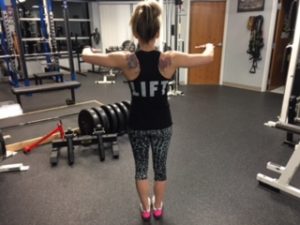
The Glute Bridge–   Lay on the floor as shown below:  Think about “pinching pennies between your cheeks” as you squeeze and engage your glute muscles before you leave the floor.  We need to activate them and wake them up before we intiate the movement, or the hamstrings and/or low back will take over the bridge.  Once we have them engaged, we are going to lift our hips up until we have a straight line between the hips and trunk, as shown in the bottom picture.  We are at hip lockout and are glutes should be contracting nicely.  Lower back to the floor under control and repeat the process.  Shoot for 8 to 10 reps without your hamstrings or back doing too much.  It this is not possible for you right now, you may need to start with your feet elevated on a box to make the exercise easier.  Other regressions are possible if necessary.  Stay tuned for a follow up article about glute bridge progressions and modifications.


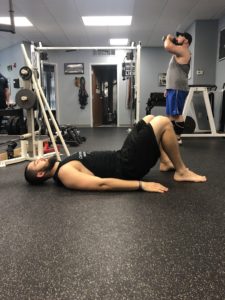
Glue bridge -bottom position

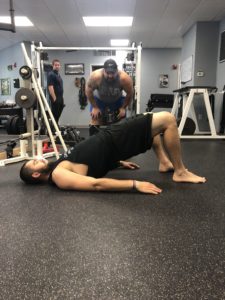
                                                                                 Glute bridge- top position

Ditch the stretching, give these exercises a try and watch your hamstring tension melt away!

Build a Healthy Roadmap

By Nick Rosencutter

Upper body training. Probably the most popular emphasis of training that you will see if you walk through most gyms throughout the country. Everybody loves pumping their biceps and building their chests up. If you are lucky, you might even find someone who enjoys chiseling out their upper back. While working the upper body might be a very common thing to come across, very few people actually understand how to train it correctly. This is because very few people understand the anatomy and biomechanics of the activities that occur up top. (and if these things were understood even a little bit, those lovely things below the belt called legs would never be neglected).

So, when we look at gym goers who do hit their upper halves a few times a week, we can generally put people into a few different groups.

Group 1- The Bench and Curl All Day Every Day Group. These people love working the muscles that they see in the mirror and do many variations of pressing and curls with some extra delt and tricep work thrown in for good measure here and there. Neglecting the opposing muscles in the back leads to problems down the road and they are left with imbalances and shoulder issues.

Group 2- The Train with some Push-Pull Balance Group. These people at least understand the importance of balancing out pushing and pulling exercises and try to do some kind of pulling exercise to provide some balance to whatever pushing/pressing exercise they might be doing.

Group 3- The Shoulder Mechanics Involve More than 2 Motions Group. These are those in the know that understand the anatomy and mechanics of the shoulder and train movement and muscle around their upper bodies with some decent anatomically balanced precision; often leading to less shoulder issues and better looking and better performing postures.

Digging into this a little deeper, while group 1 is way off of the map, group 2 at least has SOME realization about balancing out the anatomy. So what is it that they are missing that Group 3 is not? That my friends, is the question that we shall answer with the rest of this article.

To understand how to properly train, we must first look at the anatomy and mechanics. I’m going to keep this straight forward and basic so this doesn’t turn into a textbook lesson. The first thing we need to look at is the scapula (known as your shoulder blade in street talk) and the motions it is capable of. The scapula lays on the back of your rib cage and has connections with your clavicle (collar bone) and humerus (arm bone). When we talk about “push pull balance,” we are generally talking about protraction and retraction of the scapulae (although many people don’t get quality protraction even with their pushing), flexion/extension, and on some occasions, internal/external rotation of the glenohumeral joint (what most think of as the shoulder joint) .

While having some balance here is great, we also need to factor in the multiple other possible actions of the scap and gh joint. The scap can also elevate, depress, rotate upward, rotate downward and tilt forward and backward. The gh joint also internally and externally rotates, adducts and abducts. There are certain muscles that help to perform all of these actions. Anytime we move our arm, whether that be forward and backward, out to our sides or overhead and back down, our scapula, gh joint and our thoracic spine all need to move with a certain harmony amongst each other.  When one of these is off, the other(s) must compensate in order to create further motion.  Most commonly, the scapula stops moving or moves abnormally and the humeral head (top of the arm bone) glides either upward or forward to compensate, leading to impingement.  Simply pushing and pulling neglects many of these actions, although if we are talking pushing and pulling both horizontally and vertically we are at least getting closer to the prize.

Moving overhead involves multiple pieces, including flexion of the glenohumeral joint, upward rotation of the scapulae and extension of the thoracic spine


Pulling with good protraction of the scapulae and pushing with good protraction of the scapulae

Internal and External Rotation of the shoulder joint (in this instance while the scapulae are in a bit of retraction)

When we look at the most common pushing exercises that are performed, the bench press is definitely towards the top of the list. When we look at pulling exercises, a row variation is towards the top of the list as well. When done correctly, the row will work the rhomboids, mid traps and low traps, the main muscles that pull the scapulae into retraction (they pull your shoulder blades together). When done correctly, the bench press will work your pecs, anterior deltoids and triceps with the actual motion of the press; however, a correct set up involves pulling the shoulder blades together (retraction, as we learned a couple of sentences ago, which also utilizes the rhomboids). When we do too much pressing like this, without any protraction of the scapulae and pair it with straight rowing exercises, we end up getting what we call anterior glide of the humerus, where the top of your humerus (arm bone) moves towards the front of your shoulder joint, creating impingement.  This occurs because when the scapulae fails to protract sufficiently during a push motion, the humeral head compensates by moving forward in the shoulder socket excessively (anterior glide); this ends up happening if we never train scapular protraction with our pushing movements.  (Similarly, if our scapulae stop upwardly rotating when we move overhead, the humeral head tends to glide UP in the socket, causing impingement at the top of the joint)

To add further complication, when we add in any kind of shrugging exercise which involves elevation of the scapulae, the rhomboids are under pressure even more since they also assist with elevating the scapulae. Throw in some pulldowns or pullups, which involves downward rotation of the scapulae, which also activates the………guess what?………the rhomboids! So while at first glance, you might think that many people would need lots of rowing and pullups to balance out all of their pushing, you can now see that its not so black and white. When you add in the fact that any kind of pressing exercise and any kind of vertical pulling exercise also involve internal rotation of the shoulder joint, we can start to see some patterns occurring. Pecs, lats and deltoids often become overactive, pulling the shoudler joint into internal rotation and, along with the rhomboids becoming overactive, limiting protraction and upward rotation of the scapulae. While many of these people do have overactive rhomboids, many of them do still need to “open up” their shoulders. So how do we do this without creating further complications?

  1. We need to balance out the types of pushing exercises we do, being sure to include exercises that allow us to get protraction and/or upward rotation of our scapulae

  1. We need to train upward rotation of our scapulae and external rotation of our shoulder joints and/or do this ALONG with retraction.

  1. Some people might be excessively depressed and some excessively elevated. This must also be factored into any programming.

  1. Balancing out our pushing exercises

Rather than just bench pressing, incline bench pressing, decline bench pressing etc. we need to do some pushing that allows us to move our scaps freely. Landmine presses, cable pushes, overhead presses, and pushups are some great ones. These allow us to get either quality protraction or upward rotation, or some combination of the two. Ensuring that our scapula is able to move effectively in these pathways will better allow our humeral head to stay centered in the glenoid fossa (shoulder socket), preventing impingement and keeping our shoulders healthier.

YouTube player
  1. Training our scapulae to upwardly rotate and stimulating the external rotators of our shoulder to help counteract all of the internal rotation going on are essential. Beyond that, we need to train some retraction without the rhomboids taking over. Y variations and basic external rotation variations are great ways to take care of the first two. Face Pull variations are a great way to conquer our third mission here. With a face pull, our scapula is in a position of upward rotation as we pull towards our head. Since rhomboids are also downward rotators of the scapulae, this takes them out of the movement to a certain extent and allows our mid and low traps to do more with the retraction of the exercise. So we have retraction with good recruitment of the mid and low traps in a position of scapular upward rotation, which is great. Add in the fact that we also get some external rotation at the shoulder joint as we pull, and you have a phenomenal exercise that can really do a lot to help balance out all of the issues that we talked about earlier. Both double and single arm variations work well here depending on the situation and person at hand. If there is side to side imbalance going on (one scap is positioned or moves differently than the other) then it is usually best to start with single arm face pulls.


YouTube player
  1. If somebody is excessively elevated in their shoulder girdle, it is important to be sure that they do not shrug up as they perform these pulling exercises as this will add to the tension that they most likely feel quite often through their necks and shoulders. Performing a high to low face pull might also be a good idea to encourage some depression of the shoulder girdle as you pull. Being sure to keep the shoulders down and back on most pushing and pulling exercises is important here as well.

YouTube player


If somebody is excessively depressed, we need to get their shoulder girdle back up to a respectable level to allow optimal movement and to provide better support for the neck. These people often feel like their neck is “tight,” since its always being pulled on and stretched with the scapulae sitting lower than they should be. Factoring in the possibility of rhomboids being overactive from our earlier examples, we need to train elevation without overworking them more. Enter the Y shrug. This exercise allows us to engage the upper traps to help pull the scapulae up without adding fire to the rhomboids and levator scapulae, while also encouraging positive upward rotation of the scapulae via the lower traps, upper traps and serratus anterior muscles. Check it out above.

While I could go on all day about more factors that could possibly be considered in our shoulder puzzle and this is by no means an exhaustive list, these tips can and should go a long way in helping you to achieve a better balance around your joint; not to mention they should also help improve your lifts and your physique if those are goals of yours. After all, you can’t have a full road map on your back without hitting all of the muscles that are part of it.

In case you didn’t watch this video earlier, check it out now.  We go through a lot of the anatomy considerations mentioned in the article and it should help put some of the things mentioned earlier together for you.

YouTube player

Do You Have Stickability?

Check out this brilliant article by RUFP coach Brittney Wilinski

………………………………………………………………………………………………….

Do You Have Stickability?  By: Brittney Wilinski


Warning: This article is not meant as a fun, leisure read … this article is meant to find what you need to do in order to COMMIT yourself through STICKABILITY.


brit log


Today, I have hit a pretty big record for myself… I have logged my food for an entire year!!! Yes, 365 days in a row! Call me crazy, because I know MANY of you are thinking that, but it’s my way to stay dedicated, motivated, and accountable for what I am eating from day to day. Allow me to set one thing straight before I continue: Yes I logged in everyday, but it doesn’t mean I tracked every single meal or that I measured every single meal. There were days that I would track maybe one to two meals and then try to eat intuitively the rest of the day. There were days I did indeed measure and weigh my food for all five to six times I ate that day. It all varied, but it was my goal to at least put something in for every single day to keep me on the right path. Some days were a struggle, but I had my goal in mind and I knew what I needed to do. Training and lifting heavy, doing conditioning and aerobic work or “cardio” really has never been where I struggled. I struggled more with fueling my body properly. I have not been one to eat “bad;” ask any of my family or friends. I simply wasn’t eating enough, or enough of the right foods at the right time. If you really want to achieve something, then put all of your heart, mind, effort, and will power towards that damn goal. Every day you don’t do something that could push you to meeting your goal is a day wasted.

Why is it that we always make the, “Oh I am going to do this… but not until tomorrow” or the classic “I will start on Monday” B.S. excuses. I know how this goes, because I have been there, done that. The day I stopped making excuses was one of the best days of my life, because I have been able to achieve so many personal goals since then. I want to share some pictures with you, to show you that in order to reach your goal, it takes time! These pictures range from the beginning of March up until November. Before, I was the “just interested” Brittney and the later pictures show the “Commited, Stickable Brittney.” I have put in a lot of hard work, went through my highs and lows, but the journey has been worth it.


brit before brit after

brit before2 brit after 2

Interested                                             Committed and Stickable!


brit bikini shot
(This was my 2nd competition, Pride of the Midwest Physique Competition – I placed 3rd in overall and 5th in my division, Bikini Class A.My first show, NPC Badger State, I didn’t place at all and took 11th. It is a crazy exciting, inspiring, satisfying feeling you get when you meet your goal! You might not be training for a Bodybuilding show, but whatever your goal is, will sure feel damn satisfying when you reach it! I can promise that.)

 
In the book, Three Feet from Gold, there is a quote that honestly changed my mindset and life: “There is a difference in being interested and being committed.” With commitment comes stickability, and with stickability comes success. Take that and really think about it. How many times in life do we go to the gym for a week or two and we are there 3, 4, or 5 days PER week, and next thing you know, you haven’t been to the gym in over a week. You have slowly started allowing everything to be a priority except for the gym. It’s the same with eating; say you eat really well for 3 weeks, then you crave some chocolate or ice cream, you eat it, and again you fall back to your old ways of eating fast food 3-4 times a week, eating less vegetables, lean proteins, etc. and eating more pasta, deep fried foods, pastries etc., etc. What the **** (fill in as you please) just happened? Why do we allow ourselves to do this?! Why is it that when we stick to our goal for a period of time and everything is going so well, that we allow ourselves to “cheat” or get off track for one day, one meal, and then everything goes to crap. Why is it so hard to get BACK on track after just taking a small detour? The detours should be fun, relaxing, fulfilling, make us happy, and help “reset” our mindset and bodies. There are days and maybe weeks that you do need to take it a little easier on your body, do a deload program to let your central nervous system recover from your last heavy cycle and allow your body to supercompensate to help us repair our muscles and tissues and become stronger. There are days that you need to allow yourself to go out with family, friends, or significant others and have a super tasty burger, pasta dish, or a sundae and not feel bad about it. Heck, you can even make your own “cheat meal” and damn you better make what you’ve been craving or you will not be satisfied. (I have done this and then I am an angry little thing  haha) You need to be able to go off of the beaten path TEMPORARILY with the mindset that you will be able to get back on it without hesitation.

But in all seriousness, you need to answer these questions from above, write the answers down, and put them up somewhere so you can see them every day. It will remind you of what is truly holding you back from committing yourself. You need to figure out why you are only “interested” in your health rather than committing yourself to your health. You need to slowly but surely eliminate whatever it is that is holding you back so that you are able to achieve what you truly want.

We recently did a 21 day challenge at RUFP, and let me tell you, the participants did an awesome job during the challenge! They stayed on track with their eating habits exceptionally well, they were in the gym at least three times a week if not more, and they were building healthier lifestyle habits. Once the challenge ended can you guess what happened? Some of our participants only “interested” themselves for those 21 days; they did not commit. If they would have, they would still be making it to the gym three plus days a week and sticking to their healthier lifestyle habits. I am not trying to call anyone out (please don’t get mad but use this as motivation if it sounds like you!). I am just trying to give facts from real life situations that have recently occurred. If we can commit ourselves for those 21 days and MAKE time for our health, why does it have to end even though the challenge is over? Why can we not find it deep down within us to stay on track, despite the detours, if there isn’t a prize in the end? Can’t you make up your own prize to reach? Just reaping the benefits of a healthier lifestyle should be a big enough prize for many. If this isn’t the case, then let’s figure out what motivates you. Take small steps, don’t just cold turkey everything and think you are going to change all the “bad, unhealthy” habits in one day. You need to focus on one to two things to work on each week, or maybe even each month. Everyone is unique in how much they can truly commit themselves, and that’s okay. As long as you are COMMITTING yourself, full heartedly and honestly, to creating healthier lifestyle habits and not just interesting yourself in the idea, you WILL succeed in reaching your goals and becoming a better you!

After reading this, I hope you aren’t writing down or thinking of 5 to 6 different things you are going to change RIGHT NOW… that sets you up for failure. Instead, write down or think of 1 to 2 things that you can easily start working on that will help stop INTERESTING you and start COMMITING you! For me, I started by balancing out my meals better, making sure to eat some vegetables in the morning and cooking MORE and eating out less! If you want something as bad as you think you do, make it happen. The only thing standing in the way of you and your goals are your actions to become STICKABLE!

Some Thoughts on Food Prep

Here is another nice post from Dan Zwirlein that goes along nice with his last article.  In this post, he covers some brief thoughts on food prep.  Give it a read!

…………………….


I think everyone looks at food prep as a very daunting task, especially in the beginning. Like anything else, people immediately think it needs to be a complicated process. I think it can be and should be a very easy process that takes out a lot of guess work and decision fatigue from the week. Here are some things to consider/ponder:

 
*Food Prep and Meal planning saves you time. Consider how long it takes to set up, cook, and clean up every day. Somewhere between 1-2 hrs being conservative. So let’s say around 10 hrs/wk. If you prep for 2-3 meals a day but only once, it should take you 2-3 hrs at most. That saves you conservatively a few hours a week.

 
*Consider once a week or every 2-3 days. I like to make dinner and then continue cooking for the next 2-3 days after.

 
*Look at your pre prepped meals as fuel only. Nothing fancy; you just need to get good nutrition in.

 
*Use as little amount of ingredients as possible. Food prepping meals don’t need to be fancy. You need some salt, pepper, an all-purpose seasoning, oil to cook with, and maybe a sauce to top with.. that’s it. KISS method at its finest.( Keep it simple stupid)

 
*The crockpot is a lifesaver. Pro-tip, get the plastic liners for easy clean up.

 
*Save your recipes for one meal a day or rotate which ones you use. I think recipes are great but in the interest of time and overwhelming yourself I think it’s good to cook everything separate and then add ingredients after. So cook all of your meat, vegetables, and carbs separately and then mix and match together. If you want to use a recipe, let’s say for dinner, then all your other meals are already prepped and you only have to use a “recipe” for one meal a day at most. Rotate those over the course of a month or a few weeks. This does two things

1. Gets you really good at making that one meal

2. Keeps you consistent. When you add 1-2 new things in a month that’s 12-24 new meals a year… do you really need more than this? You can do a lot to the same thing to make it novel. For example, I eat eggs everyday but can cook them probably 10 different ways.

 
*Use things that are easy to prep. Examples are canned fish, nut butter, fruit, non-cooked vegetables, bread/wraps for sandwiches, lunch meat, cheese, yogurt, milk.

 
This is probably your most important habit to maintain. It teaches you how to cook, ensures that you stay on your plan and always have something to eat, and best of all it saves you time and money.

In Motion Movement Series – The Pull

Check out the third part of our movement series on Milwaukee Journal Sentinel’s In Motion and learn how to properly pull and row.

Watch the video HERE (sorry, link unavailable)MJS_Motion_The_Pull

If  you haven’t already done so, check out our 21 Day New Years Challenge Program at www.rufpchallenge.com.  21 days of developing sustainable habits to jump start your success in 2016!

rufpchallenge

RUFP In Motion Movement Series – The Squat

Check out the first part of our movement series on Milwaukee Journal Sentinel’s In Motion!  In this video, we detail the most important points of performing a successful squat.  Stay tuned for next week’s video on the hip hinge!

Check it out HERE (sorry, link unavailable)

athletic_training

Breathing with Fox 6 Studio A

studioa_400x225


Nick Rosencutter went on to Fox 6’s Studio A program last Wednesday to discuss breathing and show some effective breathing exercises to help with holiday stress.

“Between wrapping gifts and traveling to see relatives, the holidays can be stressful. Sometimes, you just need to breathe — and you might be doing that wrong. Nick Rosencutter, owner of Rosencutter Ultra Fitness & Performance, joined the Studio A team with some assistance.”

Check out the full video HERE.


fox6

Improved Breathing, Improved Human

Out of all of the things that people talk about with training and movement, breathing mechanics are one of the most important and most overlooked aspects. Breathing runs our body. Knowing this, it should be pretty easy to understand that if breathing mechanics are off, there will be compensatory problems. Faulty breathing mechanics can affect positioning, movement, pain signaling, nervous system state, blood ph levels, oxygen delivery, sleep patterns, anxiety, performance and the list goes on. Bottom line is breathing is kind of a big deal. Yet, while there are some very good fitness, rehab and related health professionals who are doing some great things with it, the vast majority in these related fields don’t even begin to think about looking at it. This is a problem and a mistake and is very unfortunate for their clients.

What is Breathing All About?

In a nutshell, breathing occurs with the purpose of taking in oxygen and expelling carbon dioxide so that we can live and go about our lives. Without it we would die. The diaphragm is our primary muscle of respiration. We then have accessory muscles that help the diaphragm to do its job by moving the ribs in various ways with each breath. These include the scalenes up in the neck, the intercostals between the ribs and the serratus posterior superior and inferior in the upper and lower back respectively, to name a few. The diaphragm essentially blows up like a balloon and moves down as we inhale and moves back up and “deflates” as we exhale while the various accessory muscles assist in moving the ribs with each breath. In an ideal world, our pelvis and ribs are lined up appropriately so that our diaphragm can grab on how it needs to and our ribs expand in the front, sides and back from the abdominal region all the way up into the chest. For many people, this does not occur because of various compensations and poor postural positioning. This leads to many problems as mentioned above.

Common Breathing Faults

1. Rib Flare and Low Back Extension

When we inhale, we want our ribs to expand all around our trunk like a balloon. Many people miss the boat and breathe only into the front as their ribs flare up and their low back extends. Though it may be subtle, when this occurs thousands of times a day, the low back and upper chest, shoulder and neck muscles that overwork when this happens become angry, inflamed and often painful. When done for a long enough period of time, this will usually show up in resting posture.

2. Excessive Rib Elevation

This can often occur along with the flare and extension from fault 1 but sometimes occurs on its own so we’ll talk about it separately. Rather than expanding the chest walls like we want, many people will simply elevate their ribs straight up in a shrugging type motion. The scalenes mentioned earlier along with the upper traps, levator scapulae and sternocleidomastoid muscles often overwork to raise the ribs up all day and get angry because of it, often leading to neck pain and headaches. They begin to act as primary breathing muscles instead of accessory breathing muscles. This is often called “chest breathing” by laypeople.

3. Poor Apical Expansion (especially right side)

As mentioned in the previous fault, many people do not get optimal expansion of their chest walls (apical expansion). This tends to be especially common on the right due to the position of our heart and our liver. With our liver towards the right and our heart towards the left, we tend to hang over our right sides, causing our right shoulders to sit lower than our left. Furthermore, our left hemi diaphragm pushes air to the right chest wall while our right hemi diaphragm pushes air to the left chest wall. Our right hemi diaphragm is apposed by the liver and the heart so it is able to push air easier than the left hemi diaphragm, which doesn’t have much to appose and help push the air. Because of this, our right upper ribs tend to get stuck in a “deflated” state. When we don’t get good apical expansion here, the elevation that was mentioned earlier sets in and the right scalenes, scm, etc. tend to take up the slack. This affects shoulder motion (often a lack of internal rotation) and head/neck mechanics. Its a big deal yet often completely overlooked.

There are also plenty of people who don’t fill either chest wall very well and get all belly motion. Remember, we want rib expansion all over the map, not just the belly. And pay attention to the fact that I said chest EXPANSION, not chest elevation, which is what occurs with the common “chest breathing” fault that is more commonly known. The Postural Restoration Institute has done a lot of great work on these apical expansion patterns.

4. Paradoxical Breathing

This type of breathing is an interesting occurence. This occurs when the belly moves in on the inhale and out on the exhale, the reverse of what should occur. If you’ve ever been to a group exercise or dance class with a “coach” or “instructor” who told you to “suck and tuck,” then this could be you (different thing but often related). This method of breathing will significantly decrease the deep and superficial stability all around your trunk and hips and can lead to a multitude of problems.

When we look at our “core” or our trunk and hips, we have deep stabilizers and superficial stabilizers. The superficial stabilizers are the ones that most people are usually talking about when they say “core.” You know, the abZ. Your rectus abdominis aka the 6 pack muscle and your external and internal obliques. If you’re lucky, low back muscles such as the erectors might even be mentioned in the convo. These guys are great and have their purpose; however, the deep stabilizers or the deep “core” need to be working properly first and need to be working harmoniously under the superficial players. The thoracic diaphragm, the pelvic floor muscles and the transversus abdominis are some major ones that need to be functioning properly.

The diaphragm attaches to the ribs, the spine and the central tendon and plays a role in both stabilization of the spine and ribs as well as a role in respiration. Ideally, we want our abdominals to brace and stabilize appropriately so that our diaphragm can focus more on respiration. We also want our diaphragm and our pelvic floor muscles to move and work together harmoniously for optimal stability, control and function. The folks at the Postural Restoration Institute go as far as calling the pelvic floor the pelvic diaphragm and the diaphragm the thoracic diaphragm, since they are so interrelated. When someone moves their belly in on the inhale and out on the exhale, this harmony is not there and stability suffers.

Looking aside at the relationship between the diaphragm and abdominals, with the “suck and tuck” method, more properly known as “hollowing,” (pulling your belly button towards your spine/sucking in your stomach) you effectively turn off the abdominal brace, making yourself unstable. Hollowing was proposed to activate the transverse abominis in isolation (which makes no sense with any exertional activity). Because of this hindering of the brace, the diaphragm then needs to turn some of its focus off of breathing and act more as a stabilizer. Guess what this leads to? Poor stability, poor respiration and oxygen delivery, poor movement, injuries and pain and the list goes on. Stuart McGill has done a lot of research comparing hollowing and abdominal bracing and makes a great point in his book “Ultimate Back Fitness & Performance:”

“Hollowing is an attempt to simply activate transverse abdominis in isolation, while bracing is simply contracting all muscles in the abdominal wall without drawing in or pushing out.” (P.120)

“Bracing appears to be a highly efficient strategy to enhance stability.” (P. 121)

“Finally, hollowing is weakening of the abdominal muscles as it can only be done when the abdominal muscles are almost inactive.” (P. 121)

That last point should resignate with you greatly if nothing else does. Don’t believe it? Try this. Lay on your back and bring your knees to your chest. Try hollowing/sucking in your stomach and straighten your legs while lowering them to the floor. Now that you feel how weak that is, brace your abs (harden them against your finger like you are about to get punched) and do the same thing. It is not even a question of which way is stronger. Try to lift anything heavy or exert yourself at all and this should happen almost automatically. The reason I’ve gone slightly off path of straight breathing is the fact that this abdominal function works so closely with breathing and the diaphragm, as mentioned above.  Is there a time and a place for hollowing?  With a specific rehab protocol for a specific reason, there absolutely may be.  For performance, in my experience and opinion, I do not see it but if someone has a specific reason for it, then power to them.

When the paradoxical style of breathing and the suck n tuck style of poor abdominal function becomes habit, excess tension is often stored throughout the body since the diaphragm never really fully relaxes between the shallow breaths that occur since it is overactive as a stabilizer. If you feel like you constantly need to hold your breath when you are engaging in physical activity (or maybe even at rest) then this is probably describing you. This then leads to our sympathetic nervous system becoming overactive and we get stuck in fight or flight mode. This can then lead to faulty ph levels, inflammation, pain, anxiety, poor sleep, poor recovery and the list goes on. This problem can occur with the other breathing faults mentioned above as well, and these faults are often combined. This paradoxical pattern just seems to be closely related with this stability vs respiration problem. So next time you have an instructor or coach who instructs you to suck and tuck and/or breathe in this manner, I strongly encourage you to ask WHY?

5. Overbreathing
All of these situations tend to lead to a hyperventilatory state of overbreathing, where more carbon dioxide is let out than normal. Think “panic state.” According to Leon Chaitow and Judith Delany in their book “Clinical Application of Neuromuscular Techniques,”
“People who overbreathe, or who have marked breathing pattern disorders automatically exhale more CO2 than is appropriate for their current metabolic needs. Exhaled CO2 derives from carbonic acid in the bloodstream, and an excessive reduction of this leads to a situation known as respiratory alkalosis, where the pH of the blood becomes more alkaline than its normal of ~7.4.” (P.31-32) They go on to talk about the fact that the increased alkalinity causes more oxygen to stay binded to hemoglobin, which then leads to reductions in calcium and phosphate levels as well as intracellular magnesium, which all leads to many undesirable things such as increased sympathetic arousal, increased sense of apprehension and anxiety, reduced pain thresholds, fatigue, trigger points, compromised core stability and loss of balance among others. “Loss of CO2 ions from neurons stimulates neuronal activity, causing increased sensory and motor discharges, muscular tension and spasm, speeding of spinal reflexes, heightened perception and other sensory disturbances. Muscles affected in this way inevitably become prone to fatigue, altered function, cramp and trigger point evolution.” (P. 32)

Bottom line and moral of the story is: Breathing affects A LOT of things. If you are not addressing it, you are missing out and probably allowing many annoying problems to continue being problems without realizing it.

Ok, so what SHOULD we do?

Generally speaking, when we practice breathing, when we inhale it should be through our nose and when we exhale it should be through our mouth. This encourages proper mechanics and movement. Inhaling through the mouth encourages excessive accessory muscle usage and is usually related to faulty breathing mechanics. When we inhale, we should get good expansion around the front, sides and back from our abdominal cavity all the way up into the chest. When we exhale, our ribs should move down and we should blow all of the air out through our mouths like we are blowing up a balloon.(Use a balloon to train it with if you really wanna get good) This allows us to get all of the tension out of our system and lets our diaphragm fully lengthen and relax so that it can then recoil and shorten/contract more effectively to give us a deeper and better inhalation. It can also help calm down excessive low back tone and get us out of the oh so common extended state. It can calm down our sympathetic nervous system, calm down pain, help us sleep and so many other things. Learn to EXHALE. Once you do this, you will be able to inhale better which will then lead to better movement, better recovery, better stability, better tissue quality, better sleep and the list goes on.

Taking things a step farther, with general physical activity we should be able to breathe effectively with our diaphragm while our abdominals do their job stabilizing. There are plenty of effective ways to train this.

If we are talking about something such as a power lift like a squat or deadlift, then we want to get full inhalation, keep the air in and use this to help increase the stability around the abdominal wall until we exhale to finish the concentric portion of the lift. (So yes, the diaphragm SHOULD use its stabilizing capabilities in some instances).

There are many exercises and drills that can be used to effectively train breathing. Check out our youtube page or come visit us to learn more.  You can also find many great ones from the Postural Restoration Institute.  Below is a great one to get you started.

The moral of the story is breathing is a big deal. It affects everything with your body. If you are not addressing it with your training, you are missing out big time.


YouTube player
e-book

Fifth Dimension Fitness presents...

Tired of not getting the results you want?

Get our FREE e-book when you sign up for our newsletter and get started on the road to success!

Get the FREE book!

This will close in 0 seconds